Running IIS Express on a Random Port
21 March 2018 • by Bob • IIS Express, Batch Files, Scripting
I have found myself using IIS Express for a bunch of web projects these days, and each of these projects is using different frameworks and different authoring systems. (Like Windows Notepad, which is still the one of the world's most-used code editors.)
Anyway, there are many times when I need multiple copies of IIS Express running at the same time on my development computer, and common sense would dictate that I would create a custom batch file for each website with the requisite parameters. To be honest, for a very long time that's exactly how I set things up; each development site got a custom batch file with the path to the content and a unique port specified. For example:
@echo off

iisexpress.exe /path:c:\inetpub\website1\wwwroot /port:8000
The trouble is, after a while I had so many batch files created that I could never remember which ports I had already used. However, if you don't specify a port, IIS Express will always fall back on the default port of 8080. What this means is, my first IIS Express command would work like the example shown below:
CMD> iisexpress.exe /path:c:\inetpub\website1\wwwroot

Copied template config file 'C:\Program Files\IIS Express\AppServer\applicationhost.config' to 'C:\Users\joecool\AppData\Local\Temp\iisexpress\applicationhost2018321181518842.config'
Updated configuration file 'C:\Users\joecool\AppData\Local\Temp\iisexpress\applicationhost2018321181518842.config' with given cmd line info.
Starting IIS Express ...
Successfully registered URL "http://localhost:8080/" for site "Development Web Site" application "/"
Registration completed
IIS Express is running.
Enter 'Q' to stop IIS Express
But my second IIS Express command would fail like the example shown below:
CMD> iisexpress.exe /path:c:\inetpub\website2\wwwroot
Copied template config file 'C:\Program Files\IIS Express\AppServer\applicationhost.config' to 'C:\Users\joecool\AppData\Local\Temp\iisexpress\applicationhost2018321181545562.config'
Updated configuration file 'C:\Users\joecool\AppData\Local\Temp\iisexpress\applicationhost2018321181545562.config' with given cmd line info.
Starting IIS Express ...
Failed to register URL "http://localhost:8080/" for site "Development Web Site" application "/". Error description: Cannot create a file when that file already exists. (0x800700b7)
Registration completed
Unable to start iisexpress.

Cannot create a file when that file already exists.
For more information about the error, run iisexpress.exe with the tracing switch enabled (/trace:error).
I began to think that I was going to need to keep a spreadsheet with all of my paths and ports listed in it, when I realized that what I really needed was a common, generic batch file that would suit my needs for all of my development websites - with no customization at all.
Here is the batch file that I wrote, which I called "IISEXPRESS-START.cmd", and I will explain what it does after the code listing:
@echo off

pushd "%~dp0"

setlocal enabledelayedexpansion

if exist "wwwroot" (
  if exist "%ProgramFiles%\IIS Express\iisexpress.exe" (
    set /a RNDPORT=8000 + %random% %%1000
    "%ProgramFiles%\IIS Express\iisexpress.exe" /path:"%~dp0wwwroot" /port:!RNDPORT!
  )
)

popd
Here's what the respective lines in the batch file are doing:
- Push the folder where the batch file is being run on the stack; this is a cool little hack that also allows running the batch file in a folder on a network share and still have it work.
- Enable delayed expansion of variables; this ensures that variables would work inside of conditional code blocks.
- Check to see if there is a subfolder named "wwwroot" under the batch file's path; this is optional, but it helps things run smoothly. (I'll explain more about that below.)
- Check to make sure that IIS Express is installed in the correct place
- Configure a local variable with a random port number between 8000 and 8999; you can see that it uses modulus division to force the random port into the desired range.
- Start IIS Express by passing the path to the child "wwwroot" folder and the random port number.
One last piece of explanation: I almost always use a "wwwroot" folder under each parent folder for a website, with the goal of managing most of the parts of each website in one place. With that in mind, I tend to create folder hierarchies like the following example:
- C:
- Production
- Website1
- wwwroot
- Website2
- ftproot
- wwwroot
- Website3
- wwwdata
- wwwroot
- Website1
- Staging
- Website1
- wwwroot
- Website2
- ftproot
- wwwroot
- Website3
- wwwdata
- wwwroot
- Website1
- Production
Using this structure, I can drop the batch file listed in this blog into any of those Website1, Website2, Website3 folders and it will "just work."
Note: This blog was originally posted at http://blogs.msdn.com/robert_mcmurray/
Rapid PHP Deployment for IIS using a Batch File
30 January 2014 • by Bob • IIS, Scripting, IIS Express, PHP
Whenever I am delivering a presentation where I need to use PHP, I typically use a batch file that I wrote in order to rapidly deploy PHP on the system that I am using for my demos. The batch file usually takes less than a second to run, which always seems to amaze people in the audience. As a result, I usually have several people ask me for my batch file after each presentation, so I thought that it would make a good subject for today's blog.
I should mention that I have used this batch file in order to demonstrate PHP with IIS in a variety of scenarios, and one of my favorite demos is when I would borrow someone's laptop and plug in a flash drive where I had IIS Express pre-installed, and then I would run the batch file in this blog to deploy PHP. Next I would launch IIS Express, open a web browser on their system, and then browse to http://localhost/ in order to show that IIS Express was working correctly. Lastly I would write a simple PHP "Hello World" page to show that PHP was up-and-running on their system in a matter of seconds.
That being said, I have to point out that there is a very important prerequisite that you must have in order to follow the steps in the blog: you need to start with a known-good installation of PHP from one of your systems, and I'll explain what I mean by that.
My batch file expects to find a folder containing ready-to-run files for PHP in order to deploy PHP on a new system. I originally obtained my PHP files by using the Web Platform Installer (WebPI) to install PHP, and then I copied the files to my flash drive or some other repository. (Note that WebPI usually installs PHP in the "%ProgramFiles(x86)%\PHP" folder.) If you don't want to use WebPI, you can also download PHP from http://windows.php.net/, but you're on your own for configuration.
Once I have the files from a known-good installation of PHP, I create the following folder structure in the location where I will be storing the files that I use to deploy PHP on other systems:
- <root folder>
- SETUP_PHP.cmd (the batch file from this blog)
- PHP (the folder containing the PHP files)
- PHP.INI
- PHP-CGI.EXE
- etc. (all of the remaining PHP files and folders)
One thing to note is that the PHP.INI file you use may contain paths which refer to specific directories on the system from which you are copying your PHP files, so you need to make sure that those paths will exist on the system where you deploy PHP.
Here is an example: when I used WebPI to install PHP 5.5 on a system with IIS, it installed PHP into my "%ProgramFiles(x86)%\PHP\v5.5" folder. During the installation process, WebPI updated the PHP file to reflect any paths that need to be defined. At the time that I put together my notes for this blog, those updates mainly applied to the path where PHP expects to find it's extensions:
extension_dir="C:\Program Files (x86)\PHP\v5.5\ext\"
What this means is - if you want to deploy PHP to some other path on subsequent systems, you will need to update at least that line in the PHP.INI file that you are using to deploy PHP. In my particular case, I prefer to deploy PHP to the "%SystemDrive%\PHP" path, but it can be anywhere as long as you update everything accordingly.
The following batch file will deploy the PHP files in the "%SystemDrive%\PHP" folder on your system, and then it will update IIS with the necessary settings for this PHP deployment to work:
@echo off

REM Change to the installation folder
pushd "%~dp0"

REM Cheap test to see if IIS is installed
if exist "%SystemRoot%\System32\inetsrv" (
  REM Check for the PHP installation files in a subfolder
  if exist "%~dp0PHP" (
    REM Check for an existing installation of PHP
    if not exist "%SystemDrive%\PHP" (
      REM Create the folder for PHP
      md "%SystemDrive%\PHP"
      REM Deploy the PHP files
      xcopy /erhky "%~dp0PHP\*" "%SystemDrive%\PHP"
    )
    pushd "%SystemRoot%\System32\inetsrv"
    REM Configure the IIS settings for PHP
    appcmd.exe set config -section:system.webServer/fastCgi /+"[fullPath='%SystemDrive%\PHP\php-cgi.exe',monitorChangesTo='php.ini',activityTimeout='600',requestTimeout='600',instanceMaxRequests='10000']" /commit:apphost
    appcmd.exe set config -section:system.webServer/fastCgi /+"[fullPath='%SystemDrive%\PHP\php-cgi.exe',monitorChangesTo='php.ini',activityTimeout='600',requestTimeout='600',instanceMaxRequests='10000'].environmentVariables.[name='PHP_FCGI_MAX_REQUESTS',value='10000']" /commit:apphost
    appcmd.exe set config -section:system.webServer/fastCgi /+"[fullPath='%SystemDrive%\PHP\php-cgi.exe',monitorChangesTo='php.ini',activityTimeout='600',requestTimeout='600',instanceMaxRequests='10000'].environmentVariables.[name='PHPRC',value='%SystemDrive%\PHP']" /commit:apphost
    appcmd.exe set config -section:system.webServer/handlers /+"[name='PHP_via_FastCGI',path='*.php',verb='GET,HEAD,POST',modules='FastCgiModule',scriptProcessor='%SystemDrive%\PHP\php-cgi.exe',resourceType='Either']" /commit:apphost
    popd
  )
)
popd
Once you have all of that in place, it usually takes less than a second to deploy PHP, which is why so many people seem interested during my presentations.
Note that you can deploy PHP for IIS Express just as easily by updating the "%SystemRoot%\System32\inetsrv" paths in the batch file to "%ProgramFiles%\IIS Express" or "%ProgramFiles(x86)%\IIS Express" paths. You can also use this batch file as part of a deployment process for PHP within a web farm; in which case, you will need to pay attention to the paths inside your PHP.INI file which I mentioned earlier.
Note: This blog was originally posted at http://blogs.msdn.com/robert_mcmurray/
How to trust the IIS Express Self-Signed Certificate
15 November 2013 • by Bob • SSL, IIS Express, WebMatrix, Visual Studio, Internet Explorer
I had an interesting question from a coworker today that I thought would make a great blog. Here's the scenario...
Problem Description
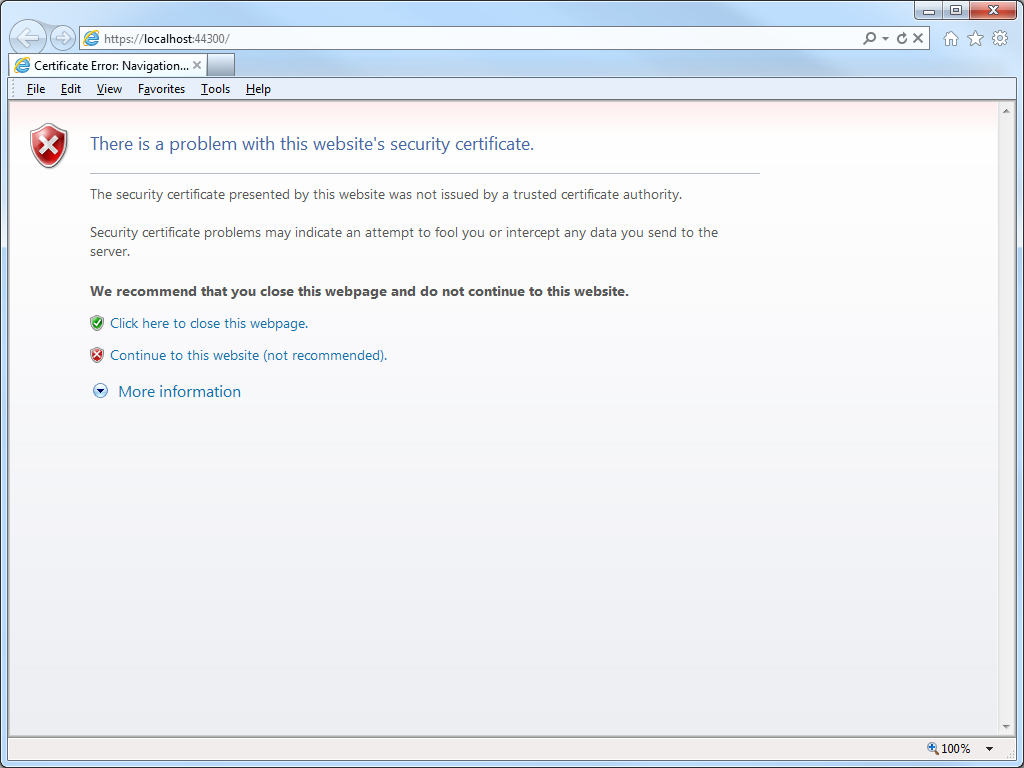
My coworker was using WebMatrix to create a website, although he could have been using Visual Studio and he would have run into the same problem. The problem he was seeing was that his application required HTTPS, but he was greeted with the following error message every time that he used Internet Explorer to browse to his development website at https://localhost:44300/:
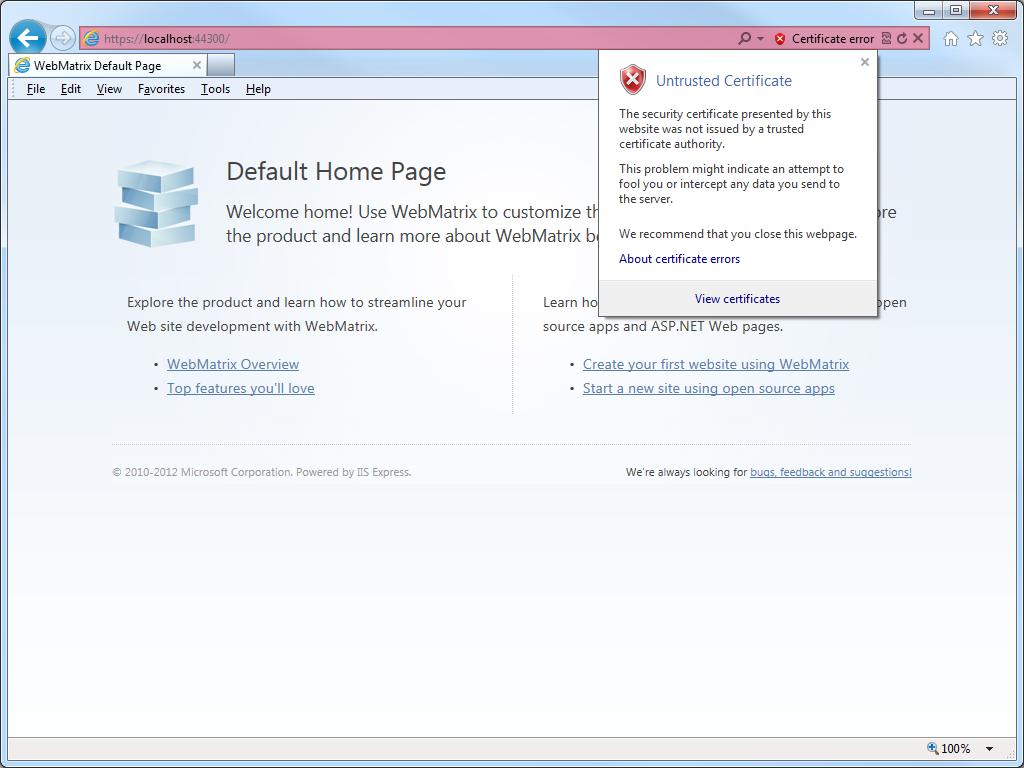
When he clicked the link to Continue to this website, he could click on Certificate error in the address bar, which would inform him that the website was using an Untrusted certificate:
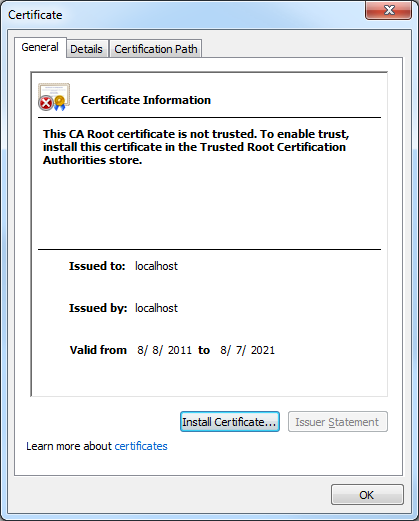
If he clicked View certificates, the Certificate dialog box informed him that the CA Root certificate was not trusted:
Cause
Since my coworker was using WebMatrix with IIS Express, which is the default development web server for WebMatrix and Visual Studio, all HTTPS communication was using the self-signed certificate from IIS Express. Since that certificate is self-signed, it is not trusted as if it was issued from a "Trusted Root Certification Authority," and therefore Internet Explorer (or any other security-conscious web browser) was doing the right thing by warning the end-user that they were using an untrusted certificate for HTTPS.
If you were seeing this error when browsing to an Internet website, this would be "A Very Bad Thing™", because you might be sending your confidential information to an untrusted website.
Resolutions
Fortunately this situation can be easily rectified, and there are two different approaches that you can use, and I will discuss both in the subsequent sections.
Resolution Number #1 - Configure your personal account to trust the IIS Express Certificate
The easiest solution is to configure your user account to trust the self-signed certificate as though it were issued by a trusted root certificate authority. To do so, use the following steps:
- Browse to https://localhost:44300/ (or whatever port IIS Express is using) using Internet Explorer and click Continue to this website:
- Click on Certificate error in the address bar, and then click View certificates:
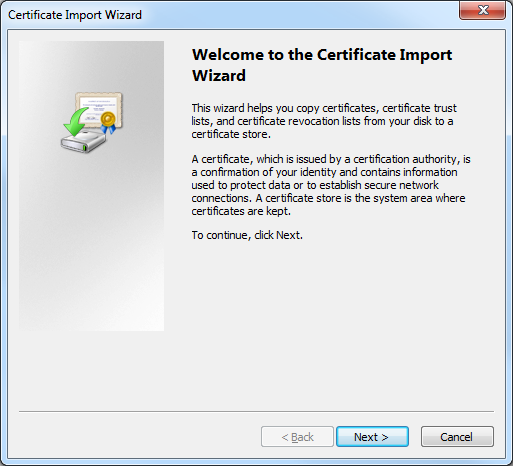
- When the Certificate dialog box is displayed, click Install Certificate:
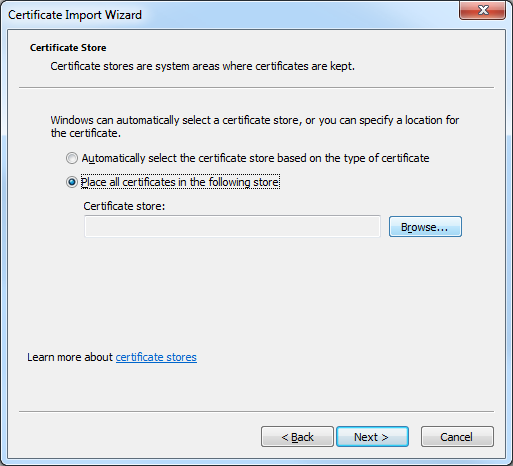
- When the Certificate Import Wizard is displayed, click Next:
- Click Place all certificates in the following store, and then click Browse:
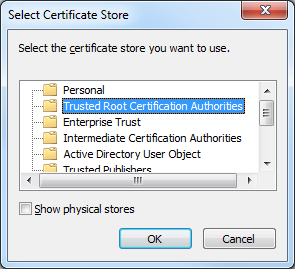
- When the Select Certificate Store dialog box is displayed, click Trusted Root Certification Authorities, and then click OK:
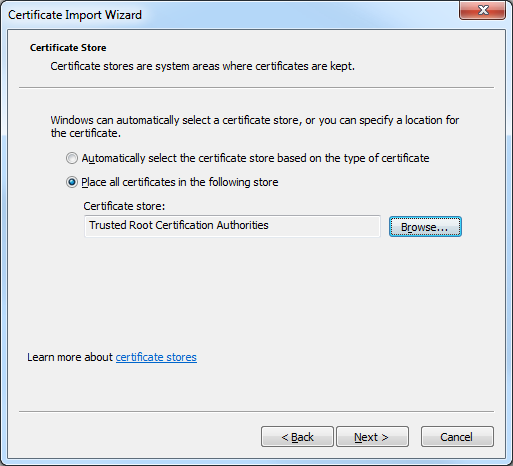
- On the Certificate Import Wizard, click Next:
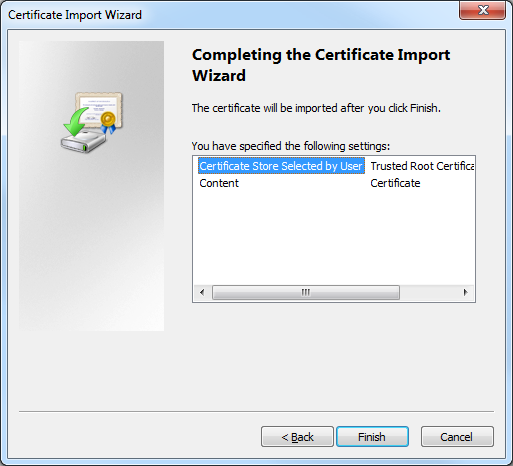
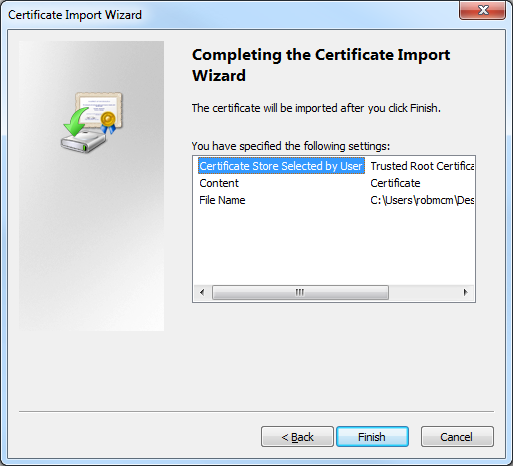
- When the Completing the Certificate Import Wizard page is displayed in the wizard, click Finish:
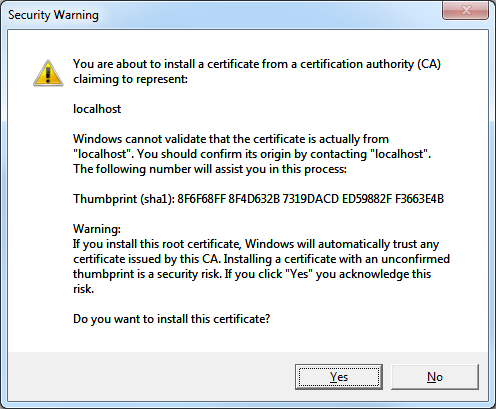
- When the Security Warning dialog box is displayed, click Yes to trust the certificate:
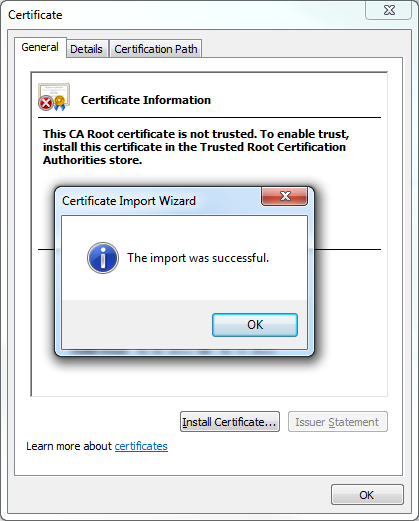
- Click OK when the Certificate Import Wizard informs you that the import was successful:
Resolution Number #2 - Configure your computer to trust the IIS Express Certificate
A more-detailed approach is to configure your computer system to trust the IIS Express certificate, and you might want to do this if your computer is shared by several developers who log in with their individual accounts. To configure your computer to trust the IIS Express certificate, use the following steps:
- Open a blank Microsoft Management Console by clicking Start, then Run, entering "mmc" and clicking OK:
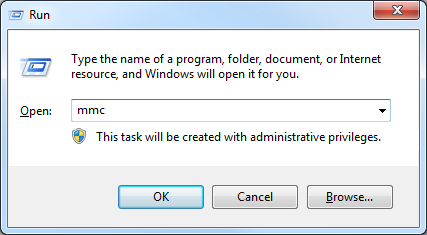
Note: You can also open a blank Microsoft Management Console by typing "mmc" from a command prompt and pressing the Enter key. - Add a snap-in to manage certificates for the local computer:
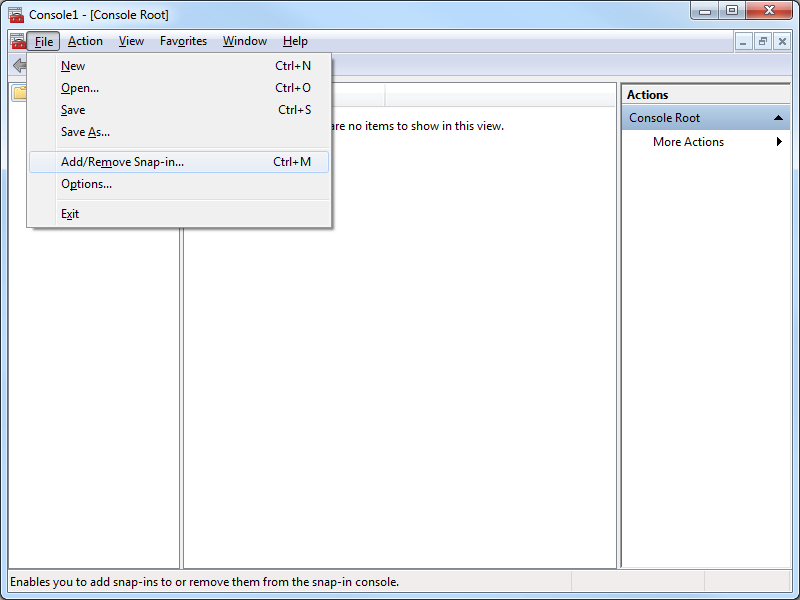
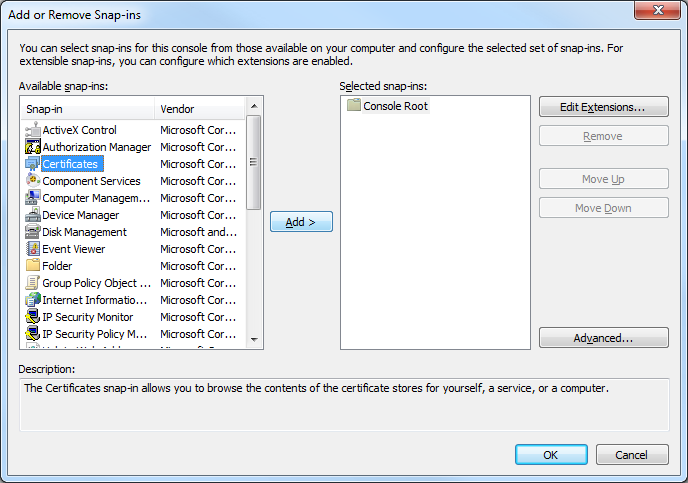
- Click File, and then click Add/Remove Snap-in:
- When the Add or Remove Snap-ins dialog box is displayed, click Certificates, and then click Add:
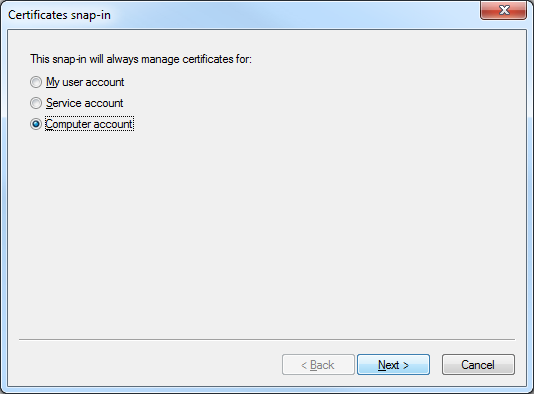
- When the Certificates Snap-ins dialog box is displayed, click Computer account, and then click Next:
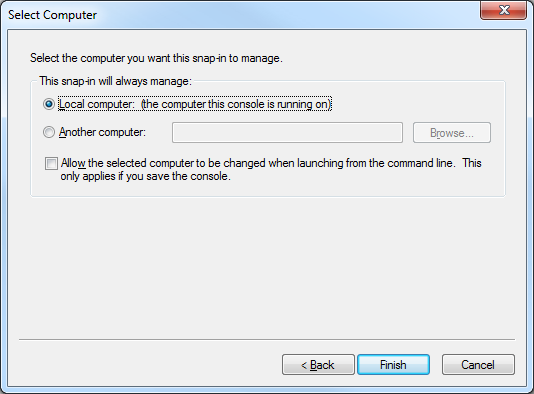
- Click Local computer, and then click Finish:
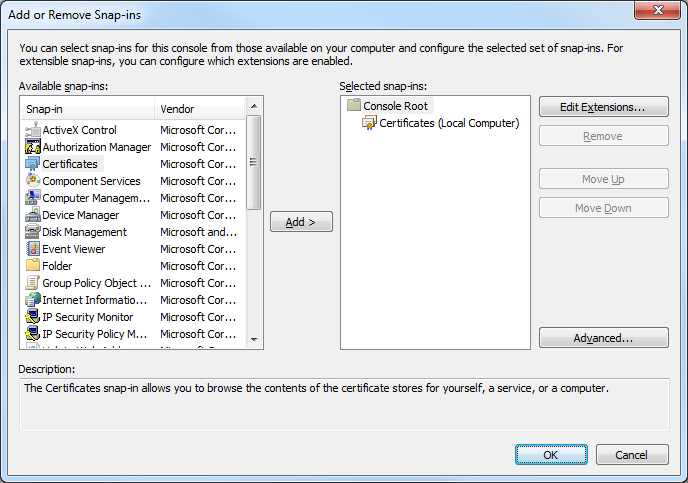
- Click OK to close the Add or Remove Snap-ins dialog box:
- Click File, and then click Add/Remove Snap-in:
- Export the IIS Express certificate from the computer's personal store:
- In the Console Root, expand Certificates (Local Computer), then expand Personal, and then click Certificates:
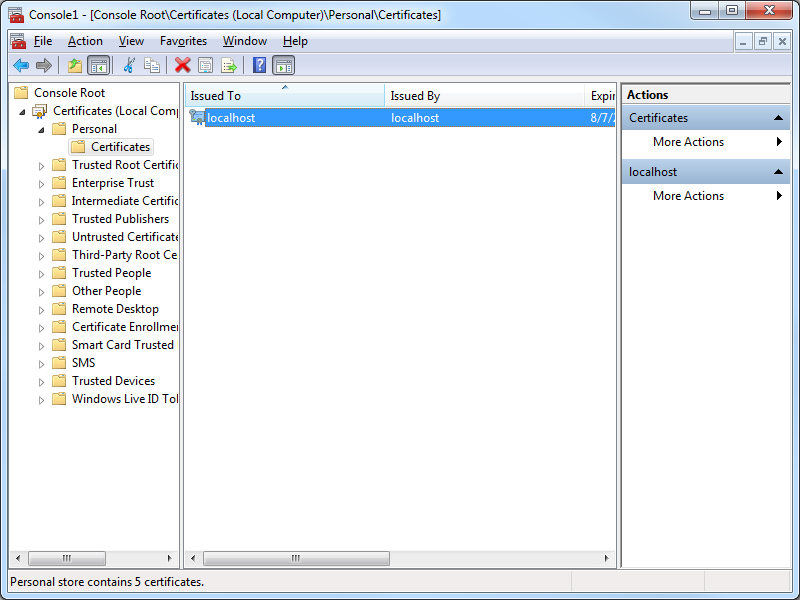
- Select the certificate with the following attributes:
- Issued to = "localhost"
- Issued by = "localhost"
- Friendly Name = "IIS Express Development Certificate"
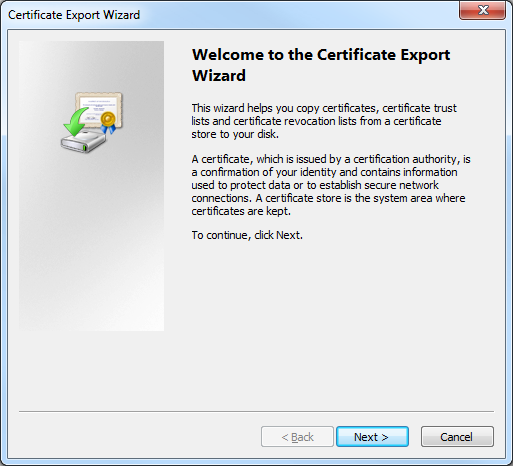
- Click Action, then click All Tasks, and then click Export:

- When the Certificate Export Wizard is displayed, click Next:
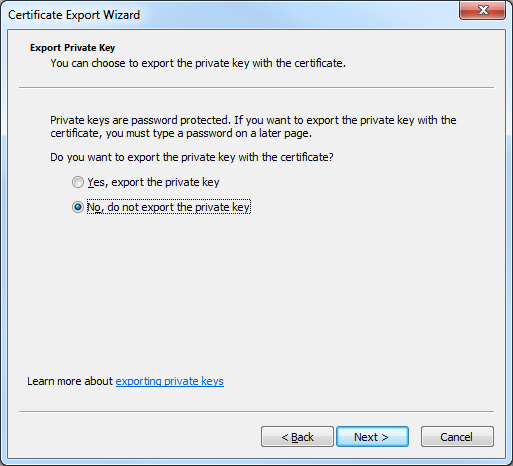
- Click No, do not export the private key, and then click Next:
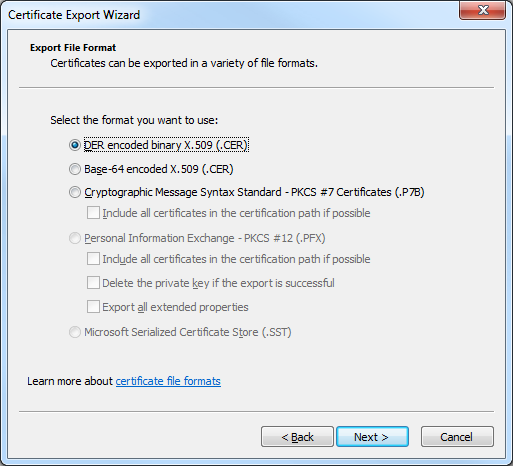
- Click DER encoded binary X.509 (.CER), and then click Next:
- Enter the path for exported certificate, e.g. "c:\users\robert\desktop\iisexpress.cer", and then click Next:
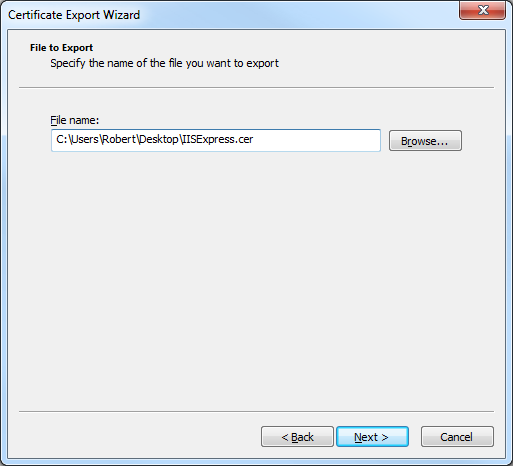
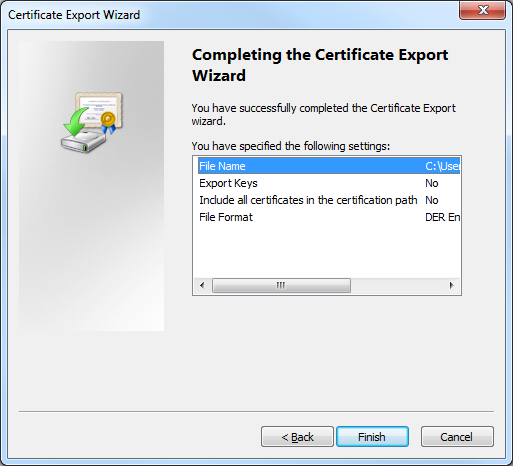
- Click Finish to export the certificate:
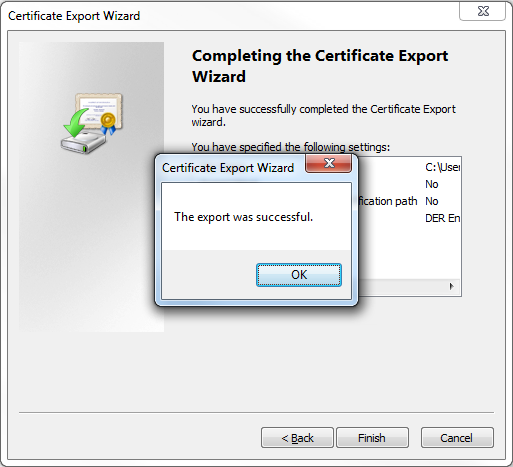
- Click OK when the Certificate Export Wizard displays a dialog box informing you that the export was successful:
- In the Console Root, expand Certificates (Local Computer), then expand Personal, and then click Certificates:
- Import the IIS Express certificate to the computer's Trusted Root Certification Authorities store:
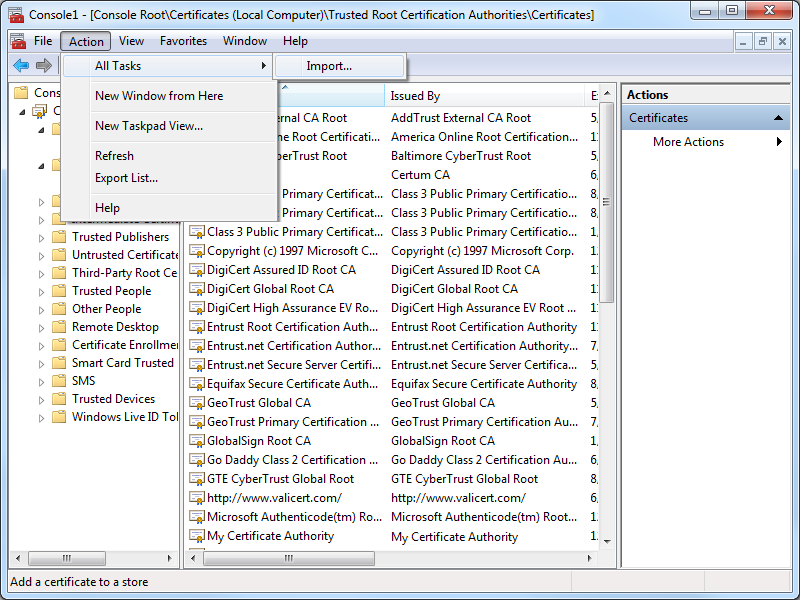
- In the Console Root, expand Certificates (Local Computer), then expand Trusted Root Certification Authorities, and then click Certificates:
- Click Action, then click All Tasks, and then click Import:
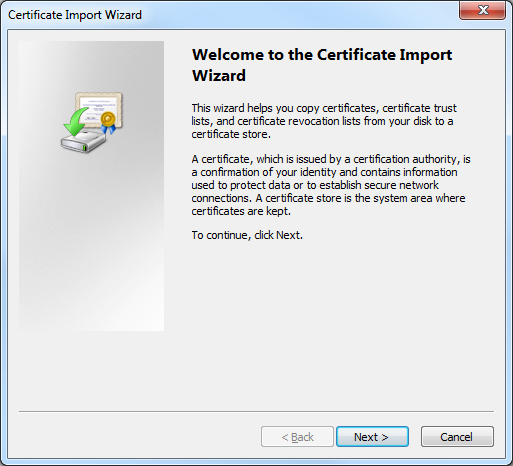
- When the Certificate Import Wizard is displayed, click Next:
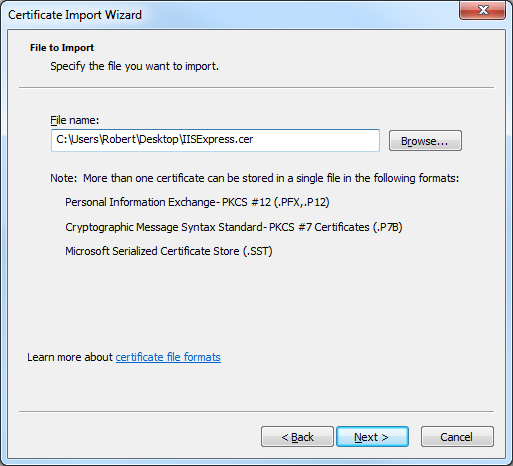
- Enter the path to your exported certificate, e.g. "c:\users\robert\desktop\iisexpress.cer", and then click Next:
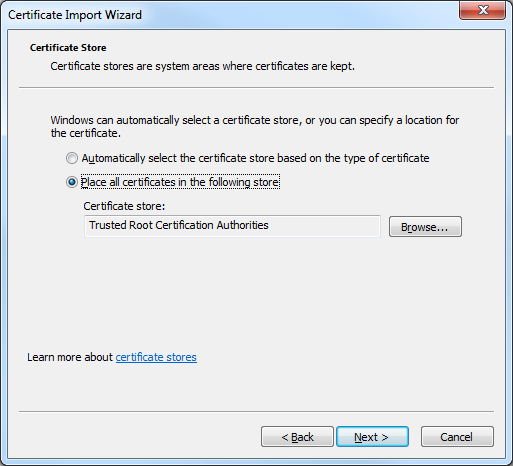
- Ensure that Place all certificates in the following store is checked and verify that the selected Certificate store is set to Trusted Root Certification Authorities, and then click click Next:
- Click Finish to import the certificate:
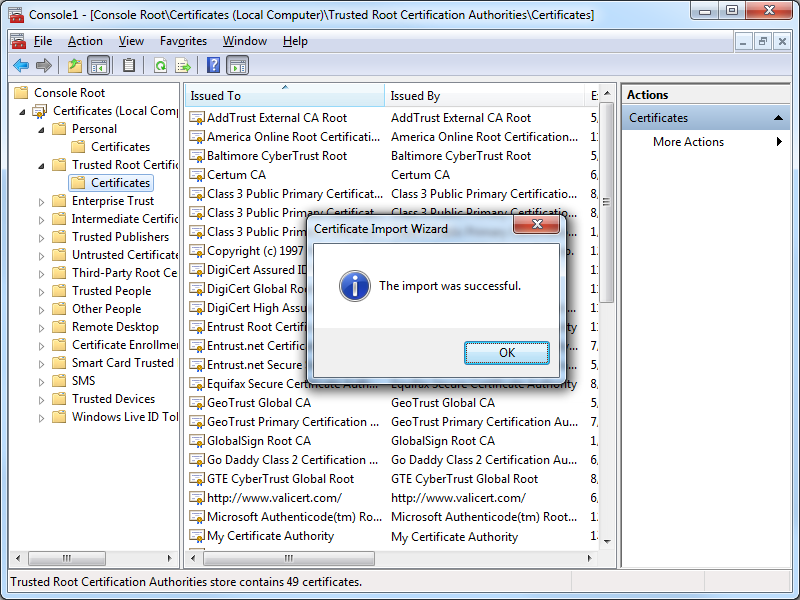
- Click OK when the Certificate Import Wizard displays a dialog box informing you that the import was successful:
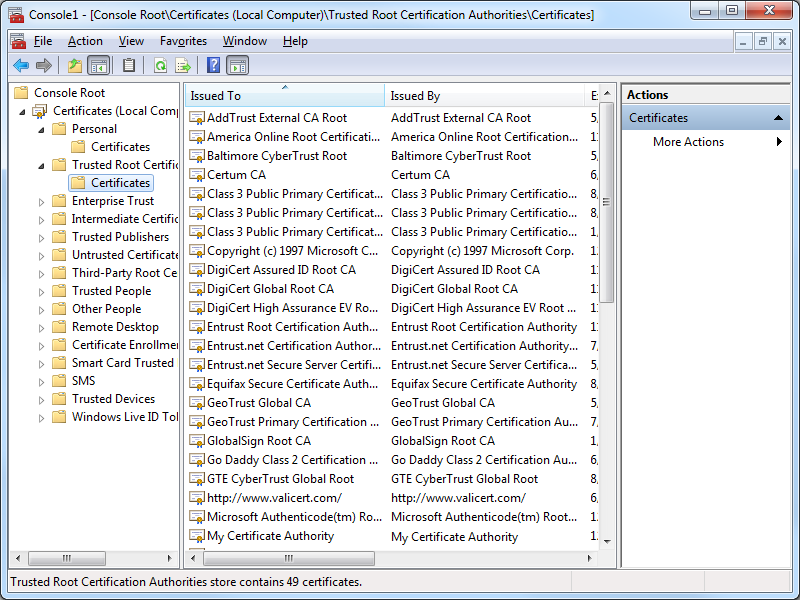
- You IIS Express certificate should now be displayed in the listed of Trusted Root Certification Authorities as "localhost":
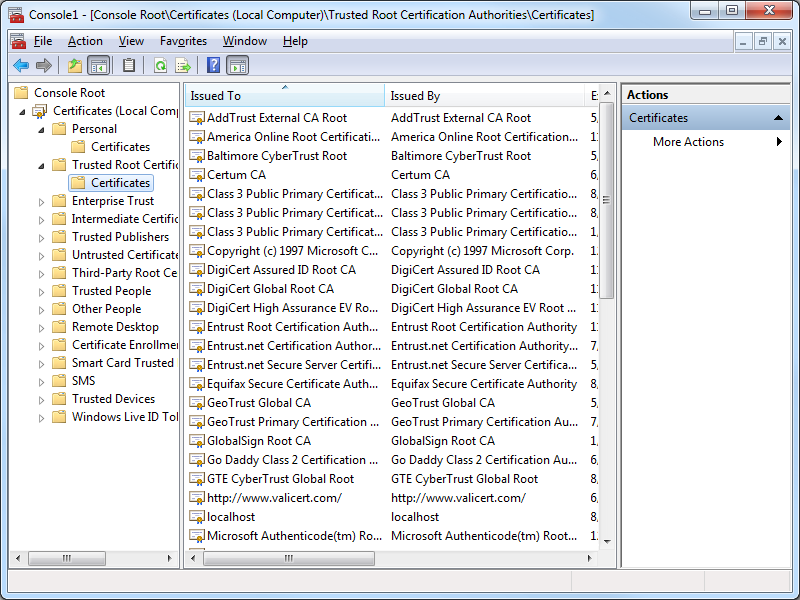
- In the Console Root, expand Certificates (Local Computer), then expand Trusted Root Certification Authorities, and then click Certificates:
Testing the Certificate Installation
Once you have completed all of the steps in one of the resolutions, you should use the following steps to test the installation of your IIS Express certificate as a trusted root certification authority:
- Close all instances of Internet Explorer that you have open.
- Re-open Internet Explorer, then browse to to https://localhost:44300/ (or whatever port IIS Express is using); your website should be displayed without prompting you to verify that you want to continue to the website.
- Click the Security Report icon in the address bar you should see that the website has been identified as localhost:
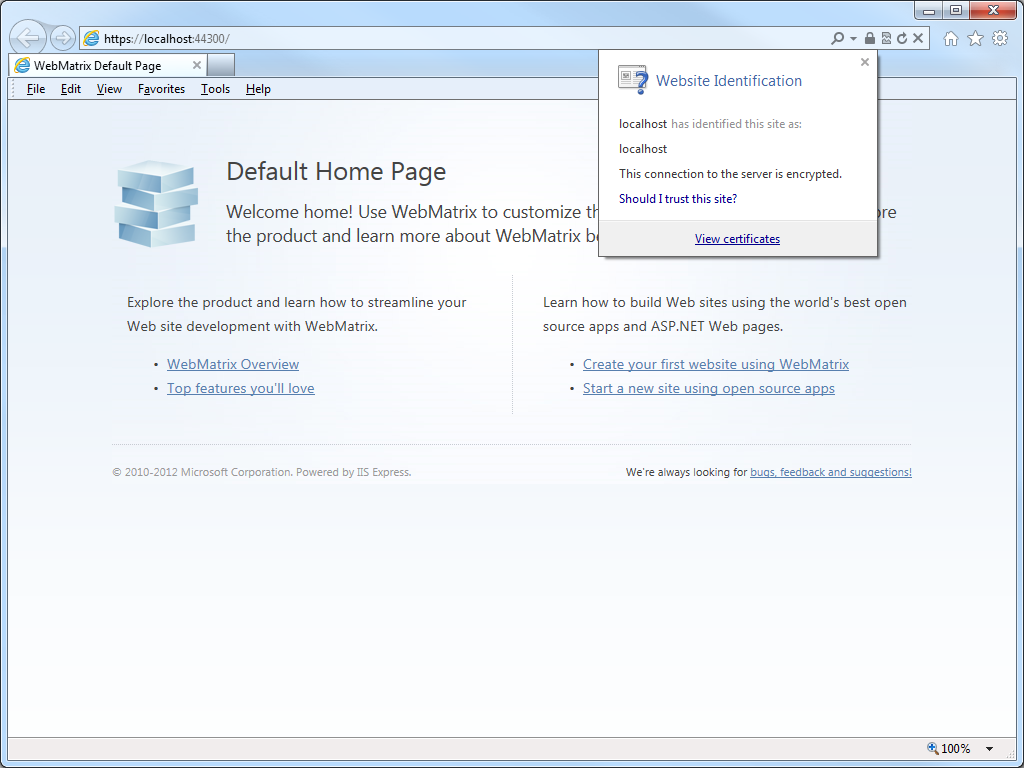
- If you click View certificates, you should now see that the certificate is trusted to ensure the identity of the computer:

In Closing...
This blog was a little longer than some of my past blogs, but it should provide you with the information you need to trust HTTPS-based websites that you are developing with IIS Express.
That wraps it up for today's blog post. ;-]
Note: This blog was originally posted at http://blogs.msdn.com/robert_mcmurray/
Connecting the Windows Phone 8 Emulator to Web API Applications on a Local Computer
20 August 2013 • by Bob • IIS Express, ASP.NET, Web API, IIS Express, ASP.NET, Web API
I've been playing around with Web API a lot recently, and I've found that it's a really powerful and elegant way to create internet-based applications. After writing several server-side Web API applications, I thought that it would be fun to write a Windows Phone 8 application that used Web API to communicate with one of my server-side applications.
I was using the Visual Studio 2013 Preview to write my Web API application, and by default Visual Studio 2012 and later use IIS Express for the development web server on http://localhost with a random port. With this in mind, I thought that it would be trivial to create a Windows Phone 8 application that would be able to send HTTP GET requests to http://localhost to download data. This seemed like an easy thing to do, but it turned out to be considerably more difficult than I had assumed, so I thought that I would dedicate a blog post to getting this scenario to work.
I should point out that I stumbled across the following article while I was getting my environment up and working, but that article had a few steps that didn't apply to my environment, and there were a few things that were required for my environment that were missing from the article:
http://msdn.microsoft.com/en-us/library/windowsphone/develop/jj684580.aspx
In addition, there were a few things that I needed that might not apply to everyone, and I'll try to point those out as I go along.
System Requirements for Windows Phone SDK 8.0
First things first, you need to make sure that you have a physical computer that meets the system requirements for the Windows Phone 8 SDK that are posted at the following URL:
http://www.microsoft.com/en-us/download/details.aspx?id=35471
Here is an annotated copy of the system requirements list at the time that I wrote this blog:
- Supported Operating Systems:
- Windows 8
- Windows 8 Pro
- Note: I also successfully used the Windows 8.1 Preview
- Operating System Type:
- Windows 8 64-bit (x64) client versions
- Note: You cannot use Windows 8 32-bit (x86) client versions
- Hardware:
- 6.5 GB of free hard disk space
- 4 GB RAM
- 64-bit (x64) CPU
- Windows Phone 8 Emulator:
- Windows 8 Pro edition or greater
- Requires a processor that supports Second Level Address Translation (SLAT)
- Note: The Windows Phone 8 Emulator runs in Hyper-V, so you cannot use a Hyper-V virtual machine for the host computer where you install the Windows Phone 8 SDK
- Additional Notes:
- If your computer meets the hardware and operating system requirements, but does not meet the requirements for the Windows Phone 8 Emulator, the Windows Phone SDK 8.0 will install and run. However, the Windows Phone 8 Emulator will not function and you will not be able to deploy or test apps on the Windows Phone 8 Emulator.
You Cannot use "Localhost" for Testing
The first time that I launched my Web API application and tried to connect to it from the Windows Phone 8 Emulator (WP8E), I used "http://localhost" as the domain where my Web API application was hosted. This was a silly mistake on my part; the WP8E runs in Hyper-V, and the WP8E believes that it is a separate computing device than your host computer, so using "http://localhost" in the WP8E meant that it was trying to browse to itself, not the host machine. (Duh.)
Your Host Computer Must Not Use IPSEC
My computer was joined to a domain, and our domain uses IP Security (IPSEC) for obvious reasons. That being said, the Windows Phone 8 Emulator is not going to use IPSEC to connect to the host machine, so I needed to find a way around IPSEC.
Our IT department allows us to make a domain-joined machine as a boundary machine to get past this problem, but I decided to set up a new, physical machine from scratch for my development testing.
Verify that the Windows Phone Emulator Internal Switch Exists
After you install the Windows Phone 8 SDK with the Windows Phone 8 Emulator (WP8E), you will have a new virtual machine in Hyper-V with a name like "Emulator WVGA 512MB"; this is the actual WP8E instance.
You should also have a new virtual switch named "Windows Phone Emulator Internal Switch" in the Hyper-V Virtual Switch Manager; WP8E will use this virtual switch to communicate with your host machine. (This virtual switch was missing on one of the systems where I was doing some testing, so I had to add it manually.)
Disable Windows Firewall on your Host Computer
Since the Hyper-V machine for the Windows Phone 8 Emulator (WP8E) and IIS Express will be communicating over your network, you will need to make sure that the Windows Firewall is not blocking the communication. I attempted to add an exception for IIS Express to the Windows Firewall, but that did not seem to have any effect - I had to actually disable the Windows Firewall on my development machine to get my environment working. (Note that it is entirely possible that I needed to configure something else in my Windows Firewall settings in order to allow my environment to work without disabling Windows Firewall, but I couldn't find it, and it was far easier in the short term to just disable Windows Firewall for the time being.)
Verify the Internal IP Address of your Windows Phone 8 Emulator
It's entirely possible that the Windows Phone 8 Emulator (WP8E) always uses a 169.254.nnn.nnn IP address on the "Windows Phone Emulator Internal Switch", but I needed to make sure which IP address range to use when configuring IIS Express.
The way that I chose to do this was to drop the following code inside my WP8E application and I stepped through it in a debugger to tell me the IP addresses that WP8E had assigned for each network interface:
var hostnames = Windows.Networking.Connectivity.NetworkInformation.GetHostNames();
foreach (var hn in hostnames)
{
    if (hn.IPInformation != null)
    {
        string ipAddress = hn.DisplayName;
    }
}
I had two IP addresses for the WP8E: one in the 192.168.nnn.nnn IP address range, and another the 169.254.nnn.nnn IP address range. Once I verified that one of my IP addresses was in the 169.254.nnn.nnn range, I was able to pick an IP address in that range for IIS Express.
Add an Internal IP Address to IIS Express for your Web API Application
Once you have verified the IP address range that the Windows Phone 8 Emulator (WP8E) is using, you can either pick a random IP address within that range to use with IIS Express, or you can use the default IP address for the Windows Phone Emulator Internal Switch. To verify the default IP address, you would need to open a command prompt and run ipconfig, then look for the Internal Ethernet Port Windows Phone Emulator Internal Switch:
| C:\>ipconfig
Windows IP Configuration Ethernet adapter vEthernet (Internal Ethernet Port Windows Phone Emulator Internal Switch): Connection-specific DNS Suffix . : Link-local IPv6 Address . . . . . : fe80::81d3:c1c7:307b:d732%11 IPv4 Address. . . . . . . . . . . : 169.254.80.80 Subnet Mask . . . . . . . . . . . : 255.255.0.0 Default Gateway . . . . . . . . . : Ethernet adapter vEthernet (Intel(R) 82579LM Gigabit Network Connection Virtual Switch): Connection-specific DNS Suffix . : Link-local IPv6 Address . . . . . : fe80::3569:3387:bb3f:583b%8 IPv4 Address. . . . . . . . . . . : 192.168.1.72 Subnet Mask . . . . . . . . . . . : 255.255.255.0 Default Gateway . . . . . . . . . : 192.168.1.1 C:\> |
If you decide to use a custom IP address in the range that your Windows Phone 8 Emulator is using, you would need to enter that IP address in the IPv4 TCP/IP settings for the Internal Ethernet Port Windows Phone Emulator Internal Switch:
 |
| (Click the image to expand it.) |
Once you have the IP address that you intend to use, you will need to add that to your IIS Express settings. There are two easy ways to do this, both of which require administrative privileges on your system:
Method #1: Use AppCmd from an elevated command prompt
Open an elevated command prompt session by right-clicking the Command Prompt icon and choosing Run as administrator, then enter the following commands:
cd "%ProgramFiles%\IIS Express"
appcmd.exe set config -section:system.applicationHost/sites /+"[name='WebApplication1'].bindings.[protocol='http',bindingInformation='169.254.21.12:80:']" /commit:apphost
Where WebApplication1 is the name of your Web API application and 169.254.21.12 is the IP address that you chose for your testing.
Method #2: Manually edit ApplicationHost.config
Open Windows Notepad as an administrator, and open the "ApplicationHost.config" file for IIS Express for editing. By default this file should be located at "%UserProfile%\Documents\IISExpress\config\ApplicationHost.config".
Locate the code for the website of your Web API application; this should resemble something like the following, where WebApplication1 is the name of your Web API application:
<site name="WebApplication1" id="1" serverAutoStart="true">
    <application path="/">
        <virtualDirectory path="/" physicalPath="%IIS_SITES_HOME%\WebApplication1" />
    </application>
    <bindings>
        <binding protocol="http" bindingInformation=":54321:localhost" />
    </bindings>
</site>
Copy the existing binding and paste it below the original entry, then change the binding to resemble the following example, where 169.254.21.12 is the IP address that you chose for your testing:
<site name="WebApplication1" id="1" serverAutoStart="true">
    <application path="/">
        <virtualDirectory path="/" physicalPath="%IIS_SITES_HOME%\WebApplication1" />
    </application>
    <bindings>
        <binding protocol="http" bindingInformation=":54321:localhost" />
        <binding protocol="http" bindingInformation="169.254.21.12:80:" />
    </bindings>
</site>
Save the file and close Windows Notepad.
Specify the Internal IP Address of your Web API Application in your Windows Phone 8 Application
Once you have configured IIS Express to use an internal IP address, you need to specify that IP address for your Windows Phone 8 application. The following example shows what this might look like:
public void LoadData()
{
    if (this.IsDataLoaded == false)
    {
        this.Items.Clear();
        WebClient webClient = new WebClient();
        webClient.Headers["Accept"] = "application/json";
        webClient.DownloadStringCompleted += new DownloadStringCompletedEventHandler(webClient_DownloadStringCompleted);
        webClient.DownloadStringAsync(new Uri(@"http://169.254.21.12/api/TodoList"));
    }
}
Where 169.254.21.12 is the IP address that you chose for your testing.
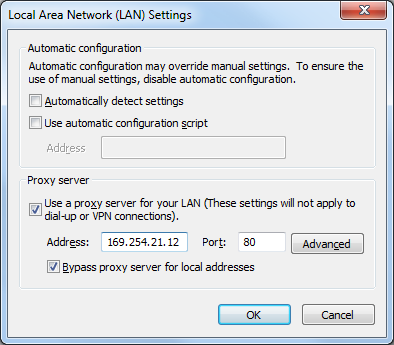
Configure Proxy Settings in your Internet Options to Bypass the Proxy for your Internal IP Address
It is essential that you configure your proxy settings so that the IP address of your Web API application will be considered an internal network address; otherwise all of the requests from the Windows Phone 8 Emulator (WP8E) will attempt to locate your Web API application on the Internet, which will fail.
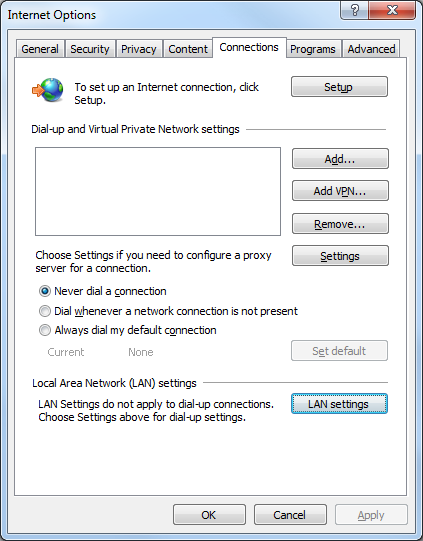
The WP8E will use the proxy settings from your Windows Internet options, which are the same settings that are used by Internet Explorer. This means that you can either set your proxy settings through the Windows Control Panel by using the Internet Options feature, or you can use Internet Explorer's Tools -> Internet Options menus.
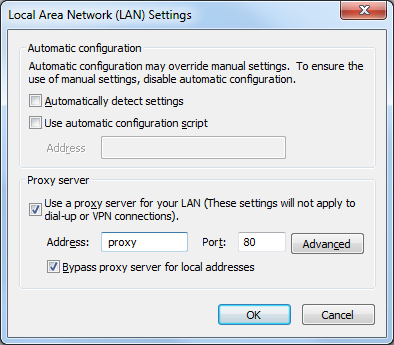
Once you have the Internet Options dialog open, click the Connections tab, then click the LAN settings button.
There are a few ways that you can specify your IP address as internal:
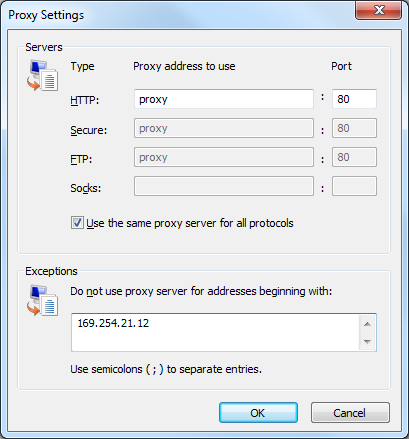
Method #1: Specify your proxy server, then click the Advanced button and add your internal IP address to the list of exceptions:
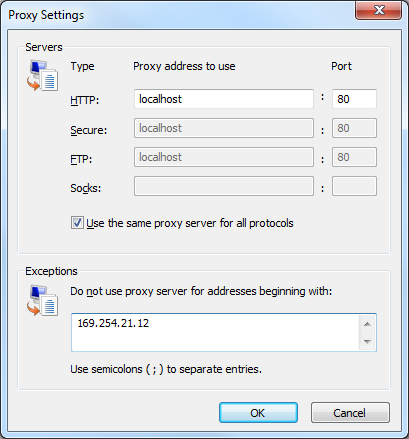
Method #2: If you do not need actual Internet access during your testing, you can specify "localhost" as the proxy server, then click the Advanced button and add your internal IP address to the list of exceptions:
Method #3: Specify your internal IP address as the proxy server; it isn't really a proxy server, of course, but this will keep the requests internal.
Launch IIS Express as an Administrator
In order for IIS Express to register a binding with HTTP.SYS on an IP address other than 127.0.0.1, you need to run IIS Express using an elevated session. There are two easy ways to do this:
Method #1: Launch IIS Express from Visual Studio as an administrator
Start Visual Studio as an administrator by right-clicking the Visual Studio icon and choosing Run as administrator. Once Visual Studio has opened, you can open your Web API project and hit F5 to launch IIS Express.
Method #2: Launch IIS Express from an elevated command prompt
Open an elevated command prompt session by right-clicking the Command Prompt icon and choosing Run as administrator, then enter the following commands:
cd "%ProgramFiles%\IIS Express"
iisexpress.exe /site:WebApplication1
Where WebApplication1 is the name of your Web API application.
In Closing
As I pointed out in my opening statements for this blog, getting the Windows Phone 8 Emulator to communicate with a Web API application on the same computer was not as easy as I would have thought, but all of the steps made sense once I had all of the disparate technologies working together.
Have fun! ;-]
Note: This blog was originally posted at http://blogs.msdn.com/robert_mcmurray/
Connecting the Windows Phone 8 Emulator to Web API Applications on a Local Computer
20 August 2013 • by Bob • IIS Express, ASP.NET, Web API, IIS Express, ASP.NET, Web API
I've been playing around with Web API a lot recently, and I've found that it's a really powerful and elegant way to create internet-based applications. After writing several server-side Web API applications, I thought that it would be fun to write a Windows Phone 8 application that used Web API to communicate with one of my server-side applications.
I was using the Visual Studio 2013 Preview to write my Web API application, and by default Visual Studio 2012 and later use IIS Express for the development web server on http://localhost with a random port. With this in mind, I thought that it would be trivial to create a Windows Phone 8 application that would be able to send HTTP GET requests to http://localhost to download data. This seemed like an easy thing to do, but it turned out to be considerably more difficult than I had assumed, so I thought that I would dedicate a blog post to getting this scenario to work.
I should point out that I stumbled across the following article while I was getting my environment up and working, but that article had a few steps that didn't apply to my environment, and there were a few things that were required for my environment that were missing from the article:
http://msdn.microsoft.com/en-us/library/windowsphone/develop/jj684580.aspx
In addition, there were a few things that I needed that might not apply to everyone, and I'll try to point those out as I go along.
System Requirements for Windows Phone SDK 8.0
First things first, you need to make sure that you have a physical computer that meets the system requirements for the Windows Phone 8 SDK that are posted at the following URL:
http://www.microsoft.com/en-us/download/details.aspx?id=35471
Here is an annotated copy of the system requirements list at the time that I wrote this blog:
- Supported Operating Systems:
- Windows 8
- Windows 8 Pro
- Note: I also successfully used the Windows 8.1 Preview
- Operating System Type:
- Windows 8 64-bit (x64) client versions
- Note: You cannot use Windows 8 32-bit (x86) client versions
- Hardware:
- 6.5 GB of free hard disk space
- 4 GB RAM
- 64-bit (x64) CPU
- Windows Phone 8 Emulator:
- Windows 8 Pro edition or greater
- Requires a processor that supports Second Level Address Translation (SLAT)
- Note: The Windows Phone 8 Emulator runs in Hyper-V, so you cannot use a Hyper-V virtual machine for the host computer where you install the Windows Phone 8 SDK
- Additional Notes:
- If your computer meets the hardware and operating system requirements, but does not meet the requirements for the Windows Phone 8 Emulator, the Windows Phone SDK 8.0 will install and run. However, the Windows Phone 8 Emulator will not function and you will not be able to deploy or test apps on the Windows Phone 8 Emulator.
You Cannot use "Localhost" for Testing
The first time that I launched my Web API application and tried to connect to it from the Windows Phone 8 Emulator (WP8E), I used "http://localhost" as the domain where my Web API application was hosted. This was a silly mistake on my part; the WP8E runs in Hyper-V, and the WP8E believes that it is a separate computing device than your host computer, so using "http://localhost" in the WP8E meant that it was trying to browse to itself, not the host machine. (Duh.)
Your Host Computer Must Not Use IPSEC
My computer was joined to a domain, and our domain uses IP Security (IPSEC) for obvious reasons. That being said, the Windows Phone 8 Emulator is not going to use IPSEC to connect to the host machine, so I needed to find a way around IPSEC.
Our IT department allows us to make a domain-joined machine as a boundary machine to get past this problem, but I decided to set up a new, physical machine from scratch for my development testing.
Verify that the Windows Phone Emulator Internal Switch Exists
After you install the Windows Phone 8 SDK with the Windows Phone 8 Emulator (WP8E), you will have a new virtual machine in Hyper-V with a name like "Emulator WVGA 512MB"; this is the actual WP8E instance.
You should also have a new virtual switch named "Windows Phone Emulator Internal Switch" in the Hyper-V Virtual Switch Manager; WP8E will use this virtual switch to communicate with your host machine. (This virtual switch was missing on one of the systems where I was doing some testing, so I had to add it manually.)
Disable Windows Firewall on your Host Computer
Since the Hyper-V machine for the Windows Phone 8 Emulator (WP8E) and IIS Express will be communicating over your network, you will need to make sure that the Windows Firewall is not blocking the communication. I attempted to add an exception for IIS Express to the Windows Firewall, but that did not seem to have any effect - I had to actually disable the Windows Firewall on my development machine to get my environment working. (Note that it is entirely possible that I needed to configure something else in my Windows Firewall settings in order to allow my environment to work without disabling Windows Firewall, but I couldn't find it, and it was far easier in the short term to just disable Windows Firewall for the time being.)
Verify the Internal IP Address of your Windows Phone 8 Emulator
It's entirely possible that the Windows Phone 8 Emulator (WP8E) always uses a 169.254.nnn.nnn IP address on the "Windows Phone Emulator Internal Switch", but I needed to make sure which IP address range to use when configuring IIS Express.
The way that I chose to do this was to drop the following code inside my WP8E application and I stepped through it in a debugger to tell me the IP addresses that WP8E had assigned for each network interface:
var hostnames = Windows.Networking.Connectivity.NetworkInformation.GetHostNames();
foreach (var hn in hostnames)
{
    if (hn.IPInformation != null)
    {
        string ipAddress = hn.DisplayName;
    }
}
I had two IP addresses for the WP8E: one in the 192.168.nnn.nnn IP address range, and another the 169.254.nnn.nnn IP address range. Once I verified that one of my IP addresses was in the 169.254.nnn.nnn range, I was able to pick an IP address in that range for IIS Express.
Add an Internal IP Address to IIS Express for your Web API Application
Once you have verified the IP address range that the Windows Phone 8 Emulator (WP8E) is using, you can either pick a random IP address within that range to use with IIS Express, or you can use the default IP address for the Windows Phone Emulator Internal Switch. To verify the default IP address, you would need to open a command prompt and run ipconfig, then look for the Internal Ethernet Port Windows Phone Emulator Internal Switch:
| C:\>ipconfig
Windows IP Configuration Ethernet adapter vEthernet (Internal Ethernet Port Windows Phone Emulator Internal Switch): Connection-specific DNS Suffix . : Link-local IPv6 Address . . . . . : fe80::81d3:c1c7:307b:d732%11 IPv4 Address. . . . . . . . . . . : 169.254.80.80 Subnet Mask . . . . . . . . . . . : 255.255.0.0 Default Gateway . . . . . . . . . : Ethernet adapter vEthernet (Intel(R) 82579LM Gigabit Network Connection Virtual Switch): Connection-specific DNS Suffix . : Link-local IPv6 Address . . . . . : fe80::3569:3387:bb3f:583b%8 IPv4 Address. . . . . . . . . . . : 192.168.1.72 Subnet Mask . . . . . . . . . . . : 255.255.255.0 Default Gateway . . . . . . . . . : 192.168.1.1 C:\> |
If you decide to use a custom IP address in the range that your Windows Phone 8 Emulator is using, you would need to enter that IP address in the IPv4 TCP/IP settings for the Internal Ethernet Port Windows Phone Emulator Internal Switch:
| |
| (Click the image to expand it.) |
Once you have the IP address that you intend to use, you will need to add that to your IIS Express settings. There are two easy ways to do this, both of which require administrative privileges on your system:
Method #1: Use AppCmd from an elevated command prompt
Open an elevated command prompt session by right-clicking the Command Prompt icon and choosing Run as administrator, then enter the following commands:
cd "%ProgramFiles%\IIS Express"
appcmd.exe set config -section:system.applicationHost/sites /+"[name='WebApplication1'].bindings.[protocol='http',bindingInformation='169.254.21.12:80:']" /commit:apphost
Where WebApplication1 is the name of your Web API application and 169.254.21.12 is the IP address that you chose for your testing.
Method #2: Manually edit ApplicationHost.config
Open Windows Notepad as an administrator, and open the "ApplicationHost.config" file for IIS Express for editing. By default this file should be located at "%UserProfile%\Documents\IISExpress\config\ApplicationHost.config".
Locate the code for the website of your Web API application; this should resemble something like the following, where WebApplication1 is the name of your Web API application:
<site name="WebApplication1" id="1" serverAutoStart="true">
    <application path="/">
        <virtualDirectory path="/" physicalPath="%IIS_SITES_HOME%\WebApplication1" />
    </application>
    <bindings>
        <binding protocol="http" bindingInformation=":54321:localhost" />
    </bindings>
</site>
Copy the existing binding and paste it below the original entry, then change the binding to resemble the following example, where 169.254.21.12 is the IP address that you chose for your testing:
<site name="WebApplication1" id="1" serverAutoStart="true">
    <application path="/">
        <virtualDirectory path="/" physicalPath="%IIS_SITES_HOME%\WebApplication1" />
    </application>
    <bindings>
        <binding protocol="http" bindingInformation=":54321:localhost" />
        <binding protocol="http" bindingInformation="169.254.21.12:80:" />
    </bindings>
</site>
Save the file and close Windows Notepad.
Specify the Internal IP Address of your Web API Application in your Windows Phone 8 Application
Once you have configured IIS Express to use an internal IP address, you need to specify that IP address for your Windows Phone 8 application. The following example shows what this might look like:
public void LoadData()
{
    if (this.IsDataLoaded == false)
    {
        this.Items.Clear();
        WebClient webClient = new WebClient();
        webClient.Headers["Accept"] = "application/json";
        webClient.DownloadStringCompleted += new DownloadStringCompletedEventHandler(webClient_DownloadStringCompleted);
        webClient.DownloadStringAsync(new Uri(@"http://169.254.21.12/api/TodoList"));
    }
}
Where 169.254.21.12 is the IP address that you chose for your testing.
Configure Proxy Settings in your Internet Options to Bypass the Proxy for your Internal IP Address
It is essential that you configure your proxy settings so that the IP address of your Web API application will be considered an internal network address; otherwise all of the requests from the Windows Phone 8 Emulator (WP8E) will attempt to locate your Web API application on the Internet, which will fail.
The WP8E will use the proxy settings from your Windows Internet options, which are the same settings that are used by Internet Explorer. This means that you can either set your proxy settings through the Windows Control Panel by using the Internet Options feature, or you can use Internet Explorer's Tools -> Internet Options menus.
Once you have the Internet Options dialog open, click the Connections tab, then click the LAN settings button.
There are a few ways that you can specify your IP address as internal:
Method #1: Specify your proxy server, then click the Advanced button and add your internal IP address to the list of exceptions:
Method #2: If you do not need actual Internet access during your testing, you can specify "localhost" as the proxy server, then click the Advanced button and add your internal IP address to the list of exceptions:
Method #3: Specify your internal IP address as the proxy server; it isn't really a proxy server, of course, but this will keep the requests internal.
Launch IIS Express as an Administrator
In order for IIS Express to register a binding with HTTP.SYS on an IP address other than 127.0.0.1, you need to run IIS Express using an elevated session. There are two easy ways to do this:
Method #1: Launch IIS Express from Visual Studio as an administrator
Start Visual Studio as an administrator by right-clicking the Visual Studio icon and choosing Run as administrator. Once Visual Studio has opened, you can open your Web API project and hit F5 to launch IIS Express.
Method #2: Launch IIS Express from an elevated command prompt
Open an elevated command prompt session by right-clicking the Command Prompt icon and choosing Run as administrator, then enter the following commands:
cd "%ProgramFiles%\IIS Express"
iisexpress.exe /site:WebApplication1
Where WebApplication1 is the name of your Web API application.
In Closing
As I pointed out in my opening statements for this blog, getting the Windows Phone 8 Emulator to communicate with a Web API application on the same computer was not as easy as I would have thought, but all of the steps made sense once I had all of the disparate technologies working together.
Have fun! ;-]
Note: This blog was originally posted at http://blogs.msdn.com/robert_mcmurray/
Working with the Different IIS Express Modes and HTTPS
03 July 2012 • by Bob • IIS Express, Scripting
I had another great question from a customer the other day, and I thought that his question was the perfect impetus for me to write blog that explained the different modes of IIS Express.
The customer's issue was that he was trying to run IIS Express from a command-line by specifying the path to a folder and he wanted to use that with SSL. He couldn't find a way to accomplish that, so he asked Scott Hanselman if there was a switch that he was missing, and Scott sent him my way. In the meantime, he was copying one of the IIS Express template ApplicationHost.config files and configuring SSL by modifying the XML programmatically.
First of all, the short answer is that there isn't some form of "/https" switch for IIS Express that the customer was asking about.
But that being said, this seemed like a great occasion for me to explain a little bit of design architecture for IIS Express, which might help everyone understand a little bit about what's going on behind the scenes when you run IIS Express.
In case you weren't aware, there are actually two modes that you can use with IIS Express:
- Personal Web Server Mode
- Application Server Mode
Having said that, I'll explain what both of those fancy titles actually mean, and how you can use IIS Express with SSL.
Personal Web Server Mode
When you are using Personal Web Server Mode, one ApplicationHost.config file is created per user by default, (unless an alternate file is specified on the command-line), and by default that ApplicationHost.config file is kept in your "%UserProfile%\Documents\IISExpress\config" folder.
In this mode, websites are persistent like they are with the full version of IIS, and the template that is used to create the per-user ApplicationHost.config file is located at:
"%ProgramFiles%\IIS Express\config\templates\PersonalWebServer\ApplicationHost.config"
Note: When you are using Personal Web Server Mode, your default website is named "WebSite1".
The general syntax for Personal Web Server Mode is:
iisexpress.exe [/config:config-file] [/site:site-name] [/systray:true|false] [/siteid:site-id] [/userhome:user-home]
If you are using IIS Express from a command-line with no parameters, or you are using IIS Express with WebMatrix or Visual Studio, then you are using Personal Web Server Mode. You can use SSL by enabling HTTPS in either WebMatrix or Visual Studio, or you can modify your ApplicationHost.config file directly and add an HTTPS binding to a website.
Application Server Mode
When you are using "Application Server Mode," a temporary ApplicationHost.config file generated when IIS Express starts in the user's "%TEMP%\iisexpress" folder.
In this mode, sites are transient like they are with Cassini, and the template that is used to create the temporary ApplicationHost.config file is located at:
"%ProgramFiles%\IIS Express\AppServer\ApplicationHost.config"
Note: When you are using Application Server Mode, your default website is named "Development Web Site".
The general syntax for Application Server Mode is:
iisexpress.exe /path:app-path [/port:port-number] [/clr:clr-version] [/systray:true|false]
If you are using IIS Express from a command-line by specifying the path to a folder, then you are using Application Server Mode, and unfortunately you can't use SSL with this mode.
Using SSL with IIS Express
As I have already mentioned, if you are using Personal Web Server Mode, you can use SSL by enabling HTTPS in WebMatrix or Visual Studio if you are using either of those tools, or you can modify your ApplicationHost.config file directly and add an HTTPS binding to a website.
However, there is no way to specify HTTPS for Application Server Mode; but that being said, there are definitely workarounds that you can use.
Copying the template file like the customer was doing is a good place to start. But I need to state an important warning: you should never modify the actual template files that are installed with IIS Express! However, if you copy the template files somewhere else on your system, you can modify the copied files as much as you want.
If you are using IIS 8 Express, we've made it possible to use AppCmd.exe with any ApplicationHost.config file by using the "/apphostconfig" switch. So instead of modifying the XML directly, you can use AppCmd.exe to make your changes for you.
For example, the following batch file creates a temporary website and sets it up for use with HTTPS:
@echo off
pushd "%~dp0"
REM Create the website's folders.
md %SystemDrive%\myhttpstemp
md %SystemDrive%\myhttpstemp\wwwroot
md %SystemDrive%\myhttpstemp\config
REM Copy the template configuration file.
copy "%ProgramFiles%\IIS Express\AppServer\ApplicationHost.config" %SystemDrive%\myhttpstemp\config
REM Configure the website's home directory.
"%ProgramFiles%\IIS Express\appcmd.exe" set config -section:system.ApplicationHost/sites /"[name='Development Web Site'].[path='/'].[path='/'].physicalPath:%SystemDrive%\myhttpstemp\wwwroot" /commit:apphost /apphostconfig:%SystemDrive%\myhttpstemp\config\ApplicationHost.config
REM Configure the website for SSL.
"%ProgramFiles%\IIS Express\appcmd.exe" set config -section:system.ApplicationHost/sites /+"[name='Development Web Site'].bindings.[protocol='https',bindingInformation='127.0.0.1:8443:']" /commit:apphost /apphostconfig:%SystemDrive%\myhttpstemp\config\ApplicationHost.config
REM Enable directory browsing so this example works without a home page.
"%ProgramFiles%\IIS Express\appcmd.exe" set config "Development Web Site" -section:system.webServer/directoryBrowse /enabled:"True" /commit:apphost /apphostconfig:%SystemDrive%\myhttpstemp\config\ApplicationHost.config
REM Run the website with IIS Express.
"%ProgramFiles%\IIS Express\iisexpress.exe" /config:%SystemDrive%\myhttpstemp\config\ApplicationHost.config /siteid:1 /systray:false
REM Clean up the website folders.
rd /q /s %SystemDrive%\myhttpstemp
popd
As you can see in the above example, this is a little more involved than simply invoking Application Server Mode with a switch to enable HTTPS, but it's still very easy to do. The changes that we've made in IIS 8 Express make it easy to script Personal Web Server Mode in order to enable SSL for a temporary website.
In Closing...
I hope this information makes using the various IIS Express modes and SSL a little clearer, and you can get IIS 8 Express by following the link in the following blog post:
Note: This blog was originally posted at http://blogs.msdn.com/robert_mcmurray/
Microsoft IIS 8.0 Express Release Candidate is Released!
31 May 2012 • by Bob • IIS Express
In addition to all of the other great products that Microsoft has released today, I’m happy to announce the release of the Internet Information Services (IIS) 8.0 Express Release Candidate. You can install the IIS 8.0 Express Release Candidate through the Microsoft Download Center by using the following URL:
http://go.microsoft.com/fwlink/?LinkId=254247
IIS 8.0 Express Release Candidate supports the following new features:
- X64 Support
- IIS 8.0 Express supports both 32-bit and 64-bit architectures.
- Shared Features with IIS 8.0
- IIS 8.0 Express shares a great number of features with the full version of IIS; for example, IIS 8.0 Express uses many of the same binaries, configuration files, and error codes as the full version of IIS, so migrating projects between your development environment and your production environment should be easier than ever.
- Changing the User Home Directory
- IIS 8.0 Express supports changing the user's home directory, which is mapped to the %IIS_USER_HOME% variable in configuration. By default this path is located at %UserProfile%\Documents\IISExpress, but users can change this by setting a CustomUserHome registry property in HKCU\Software\Microsoft\IISExpress, or by specifying the "/userhome" parameter when launching iisexpress.exe.
- WebSocket Support
- IIS 8.0 Express supports writing WebSocket applications. For more information, see the WebSocket protocol specification or the System.Net.WebSockets Namespace topic on Microsoft's MSDN website.
- AppCmd Support for editing multiple configuration files
- The AppCmd utility now supports a "/AppHostConfig" parameter, which makes it possible to use AppCmd to edit multiple ApplicationHost.config files and not just the primary configuration file.
For more information, see the IIS 8.0 Express ReadMe file.
My thanks to Eok Kim, Jeong Hwan Kim, Yamini Jagadeesan, Wade Hilmo, and Won Yoo!
Note: This blog was originally posted at http://blogs.msdn.com/robert_mcmurray/
Microsoft IIS 8.0 Express Beta is Released!
05 March 2012 • by Bob • IIS Express
Earlier today the IIS Express team released the IIS 8.0 Express Beta, and there are some great new features in this release! Here are just a few of the highlights:
- 64-bit Support
- IIS 8.0 Express now fully supports 64-bit application development. When you install IIS Express on a 64-bit system, you actually get both 32-bit and 64-bit versions of IIS 8.0 Express installed, which allows you to use the version that matches your project's needs.
- Customizable Home Directory
- The default home directory for IIS Express is "%UserProfile%\Documents\IISExpress", but with IIS 8.0 Express you can start the iisexpress.exe process with the "/userhome" parameter to specify the home directory for your projects; this makes it easier for you to use IIS 8.0 Express with multiple development applications.
- AppCmd Support for Multiple ApplicationHost.config Files
- As a complement to allowing users to customize their IIS Express home directory, IIS 8.0 Express contains a new version of AppCmd.exe that supports a new "/AppHostConfig" parameter, which makes it possible to use AppCmd.exe to edit multiple ApplicationHost.config files. By default AppCmd.exe for IIS 7 or IIS 7.5 Express will only edit the ApplicationHost.config file in your "%WinDir%\System32\InetSrv\Config" or "%UserProfile%\Documents\IISExpress" folder, but the AppCmd.exe command-line utility that ships with IIS 8.0 Express allows you to edit ApplicationHost.config files anywhere on your system.
You can read more about this release at the following URL:
http://learn.iis.net/page.aspx/1266/iis-80-express-beta-readme/
Note: This blog was originally posted at http://blogs.msdn.com/robert_mcmurray/